Line-in-shape written using PsychoJS #
Github: https://github.com/tmprk/line-in-shape-psychojs
Initial Problem #
It is not straightforward to build complex layouts and shapes in PsychoPy’s graphical builder. A custom python script is required, but it can only be run on the device it is installed on and cannot be deployed on the web.
The PsychoPy organization created some conversion tools to convert a PsychoPy project to PsychoJS. However, only projects created using the PsychoPy graphical Builder can be converted this way.
Solution #
As a result, I got a barebones PsychoJS project and modified it to run line-in-shape. This required new Javascript classes and functions, as well as modification of the source code to communicate with a server of your choosing. Read manual coding of PsychoJS studies, which described my situation perfectly.
Key parts of the solution #
PsychoJS library doesn’t require any server-side code to display shapes and accept keystrokes, etc. This means you can run it in a browser as long as all assets are present.
This was a perfect use-case for serverless architecture, where we could host the static assets (HTML/CSS/JS/images) on Netlify and call Netlify Functions for uploading data to our database of choice. In the words of Netlify:
Deploy server-side code that works as API endpoints, runs automatically in response to events, or processes more complex jobs in the background.
Functions receive request context or event data, and return data back to your front end.
This is perfect because everything up until the CSV upload is local; displaying shapes, keystroke input, trial results, and CSV formatting are all done in javascript on the browser. Once all the this happens, the plan was to call a Netlify function endpoint (passing in the CSV data through the event body) and my function would handle the data and upload it somewhere safe.
In addition to the actual program written in PsychoJS, here is a simple Netlify function I used:
// Grab our credentials from a .env file or environment variables
require('dotenv').config();
const { DATABASE_URL, SUPABASE_SERVICE_API_KEY } = process.env;

// Connect to our database
const { createClient } = require('@supabase/supabase-js');
const supabase = createClient(DATABASE_URL, SUPABASE_SERVICE_API_KEY);

// Our standard serverless handler function
exports.handler = async event => {
    if (event.httpMethod == 'POST') {
        console.log(typeof(event.body))
        console.log('body:', event.body, '\n')
        console.log('filename:', JSON.parse(event.body).filename, '\n')
        console.log('contents:', JSON.parse(event.body).csv, '\n')

        const body = JSON.parse(event.body)
        const filename = body.filename
        const contents = body.csv

        // Insert a row
        const { data, error } = await supabase.storage
            .from('results')
            .upload(filename, contents, {
                contentType: 'text/csv'
            })

        // Did it work?
        if (data) {
            console.log(data);
            return {
                statusCode: 200,
                body: JSON.stringify({
                    message: 'sent a post request containing blob'
                }),
            }
        } else {
            console.log(error);
            return {
                statusCode: 500,
                body: JSON.stringify({
                    message: "POST didn't go through"
                }),
            }
        }
    }
}
But how will this Netlify function be called? The psychojs program must call this endpoint (/api/upload-csv) by itself, so I added this snippet to the PsychoJS code. This goes in uploadData(key, value) of ServerManager.js. Towards the end of the experiment when uploadData is executed, the Netlify function should be called.
const self = this;
const URL = '/api/upload-csv' // Netlify function is located at this endpoint !!!

return new Promise((resolve, reject) => {
    let type = "text/csv"
    // "value" is the comma separated value passed into the function
    const blob = new Blob([value], { type });
    fetch(URL, {
        method: 'post', // make a post request to the endpoint above
        headers: {
            'Accept': 'application/json, text/plain, */*',
            'Content-Type': 'application/json'
        },
        body: JSON.stringify({ filename: key, csv: value }) // the data
    }).then(res => res.json())
        .then(res => console.log(res));
});
How to use the program #
I actually have a version deployed right now. It is located on the domain psych dot netlify dot app (doing this to prevent bots). Just navigate to this domain and you can try it out. It will look something like this without the developer tools on the right side, which was for debugging purposes.
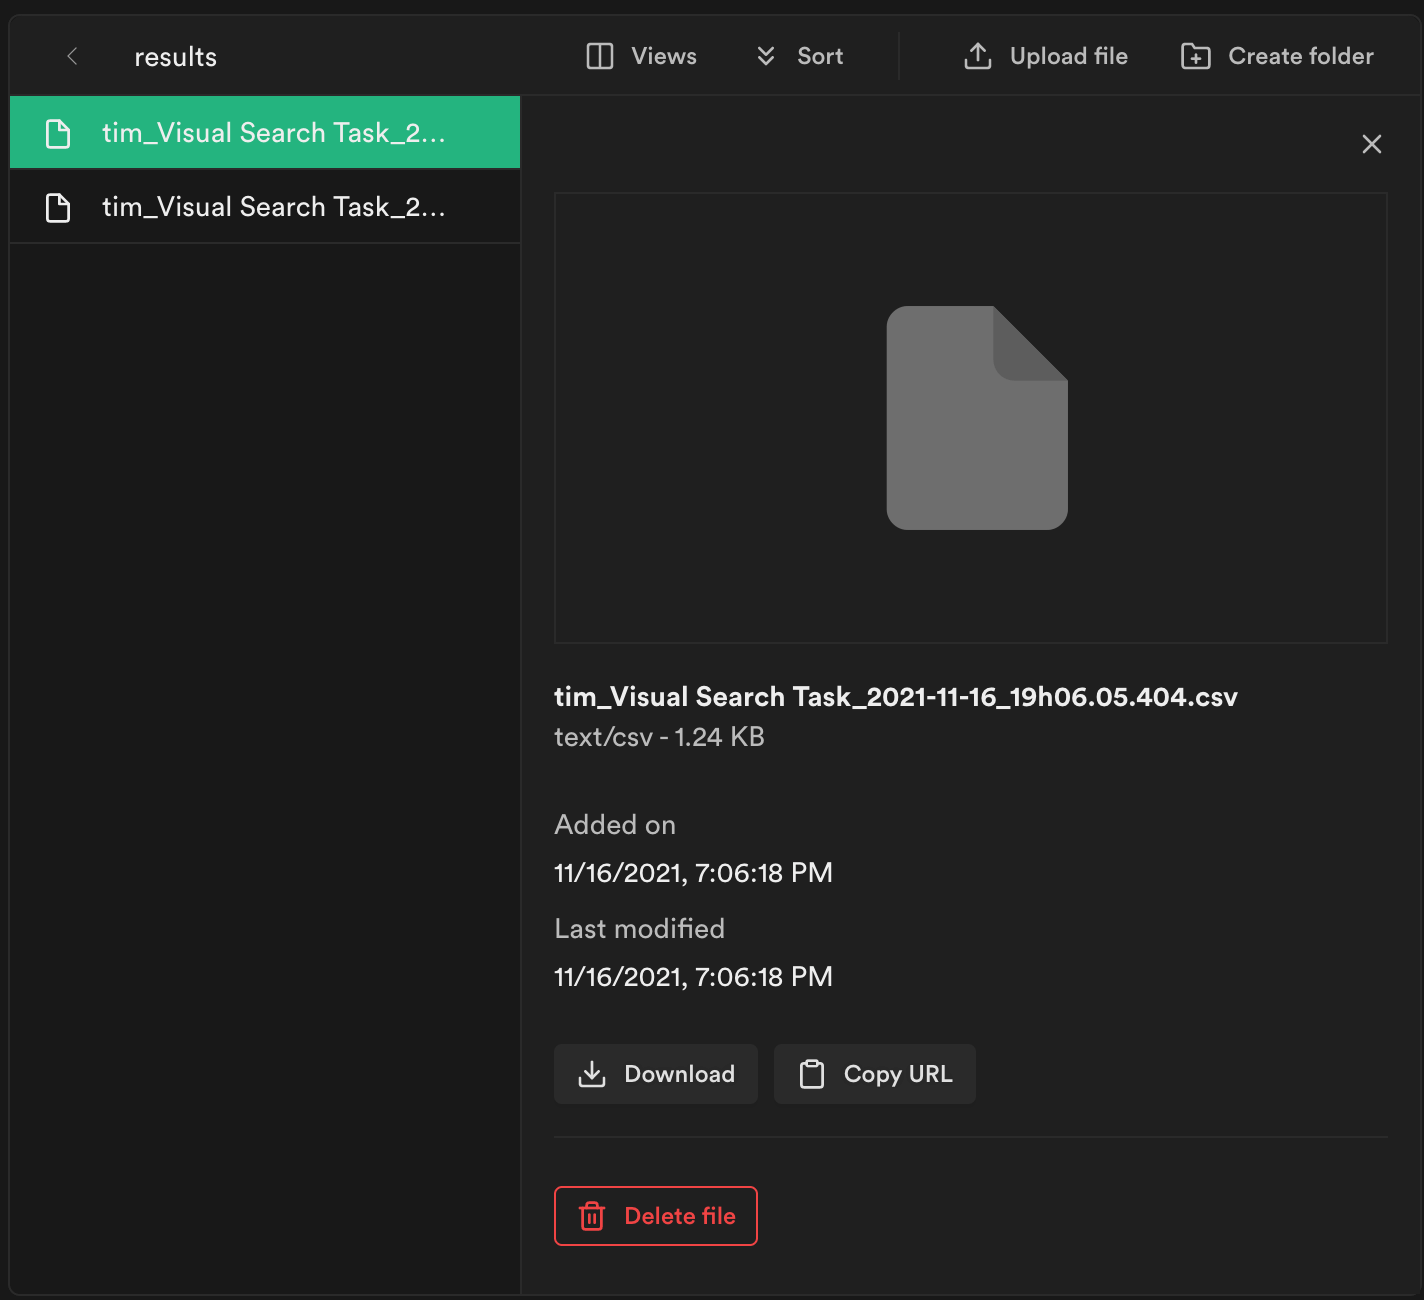
The program will let you know when the experiment has ended. However, where is the data hosted? As you may have seen earlier in the Netlify function, supabase is used as a datastore. The deployed version will send data to my Supabase bucket. When I navigate to my supabase storage dashboard, I see a list of CSVs that can be downloaded:
How to install it on your own #
Great, now you’re ready to download the code and make some of your own changes. Before you clone the repository containing the code, there are some prerequisites:
- If you’re on mac, brew package manager. If you’re on Windows move to the next step.
- Node and npm, for javascript runtime (local server)
For mac users:
brew install node
node --version # to check if it's there
For windows users: navigate to nodejs.org and get the latest version.
- Open Terminal on mac, or Command prompt on Windows and download the Netlify dev cli (for testing locally).
# Install the Netlify CLI
npm install netlify-cli -g
Once you have all of these, you’re now ready to test the core psychojs program and the Netlify functions (these are included in the repository). First clone this this github repository.
git clone https://github.com/tmprk/line-in-shape-psychojs/tree/serverless

cd line-in-shape-psychojs # change directory to the code
ls # list contents of directory

# this should be what it looks like
└── psychopy
    ├── functions
    ├── library
    ├── scripts
    ├── index.html
    ├── netlify.toml
    ├── package.json
    ├── stimulus.js
    ├── visual-search-legacy-browsers.js
    └── visual-search.js
If you try to run netlify dev or any local server to test out your program, it will not work, as many of the essential javascript dependencies are missing. The code you cloned does not include these dependences (because they take up space) but keeps a list of them in package.json. Run npm install in the root of the project. You should now see node_modules, which are used by the program.
Next, run the Netlify dev tools in the root of the project
netlify dev

# it should output something like this
◈ Netlify Dev ◈
◈ Ignored build settings env var: DATABASE_URL (defined in .env file)
◈ Injected .env file env var: DATABASE_URL
◈ Ignored build settings env var: SUPABASE_SERVICE_API_KEY (defined in .env file)
◈ Injected .env file env var: SUPABASE_SERVICE_API_KEY
◈ Ignored general context env var: LANG (defined in process)
◈ Ignored general context env var: LC_ALL (defined in process)
◈ No app server detected. Using simple static server
◈ Unable to determine public folder to serve files from. Using current working directory
◈ Setup a netlify.toml file with a [dev] section to specify your dev server settings.
◈ See docs at: https://cli.netlify.com/netlify-dev#project-detection
◈ Running static server from "line-in-shape"
◈ Loaded function upload-csv.
◈ Functions server is listening on 52182

◈ Static server listening to 3999
Navigate to http://localhost:3999, or replace 3999 with whatever the output says the static server is running on. You should now see the PsychoJS program! One problem, when you finish the experiment and the program tries to upload, it is unable to because no API keys are provided. To do this, you need your own supabase account and create a bucket to hold the CSVs. This next part should help accomplish that.
Collecting CSV data (and self-hosting methods) #
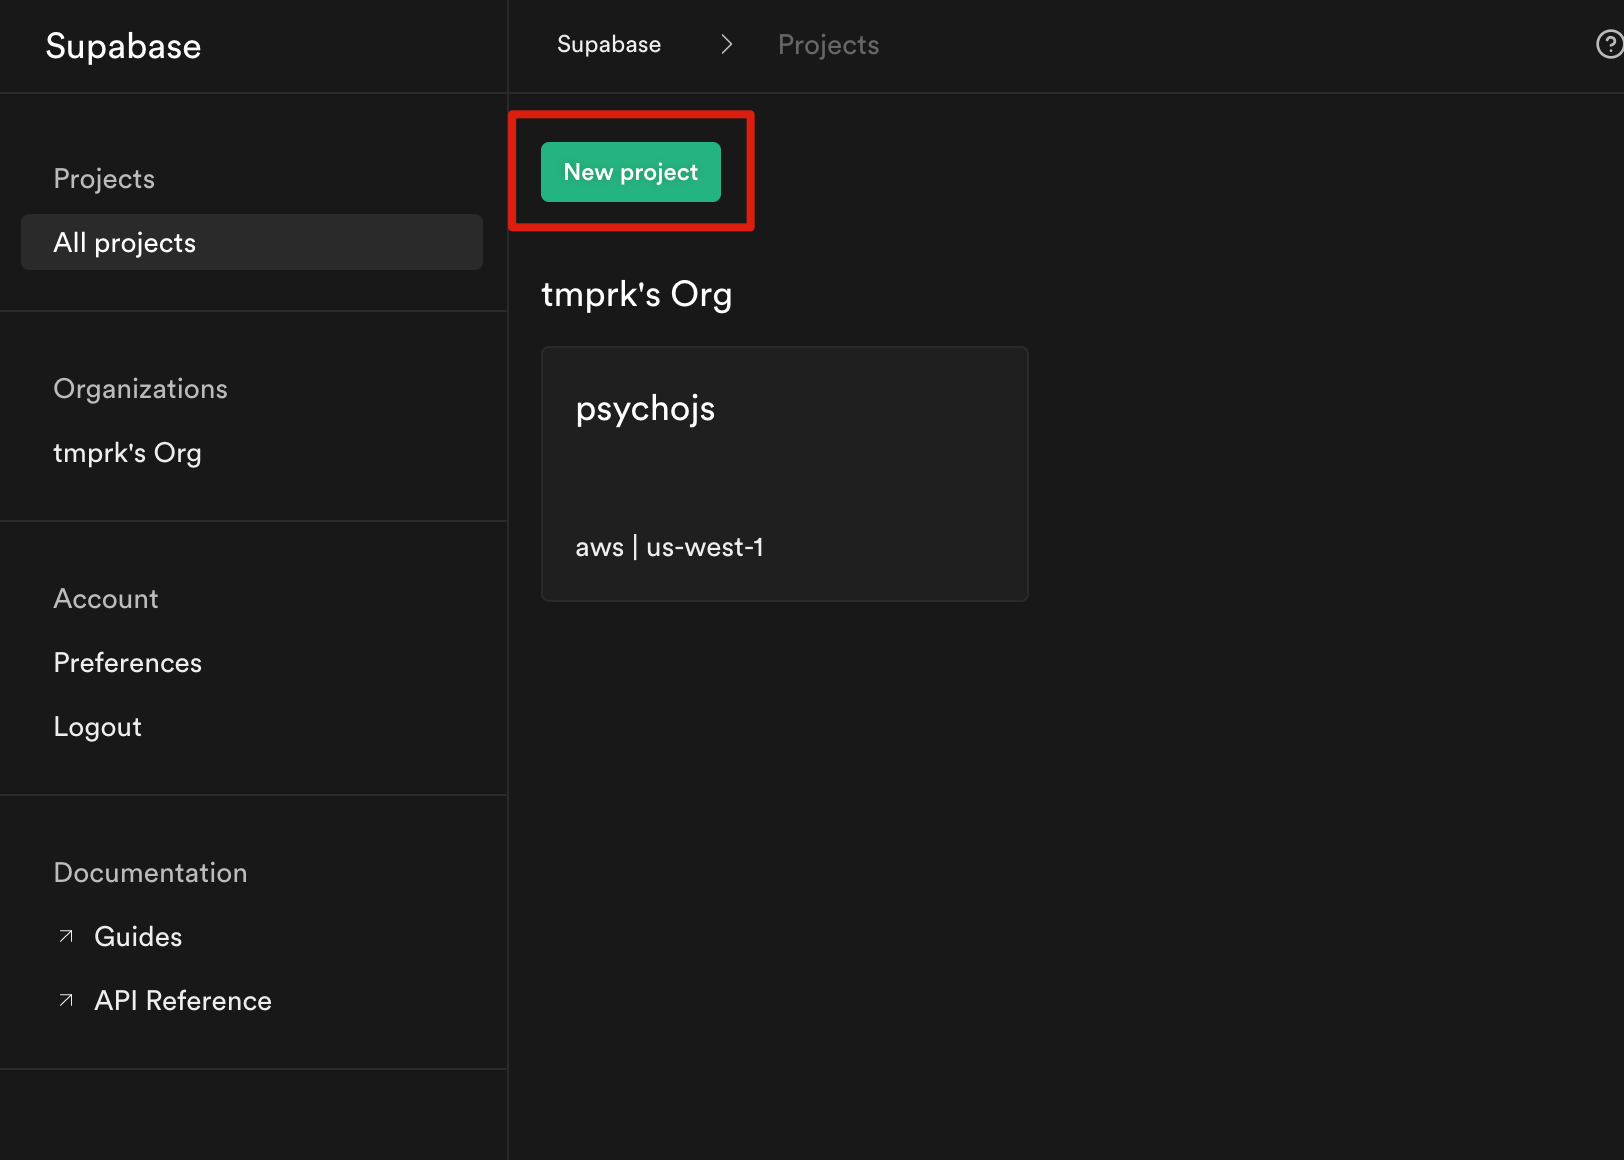
To get a datastore yourself or your own organization, there are many options. You can you Amazon AWS, MongoDB, Fauna DB, the list goes on. I just chose supabase because I was having issues getting AWS Dynamo DB to work. First, sign up with Supabase using the third-party Github login. On your supabase dashboard, click “New Project” and name it accordingly.
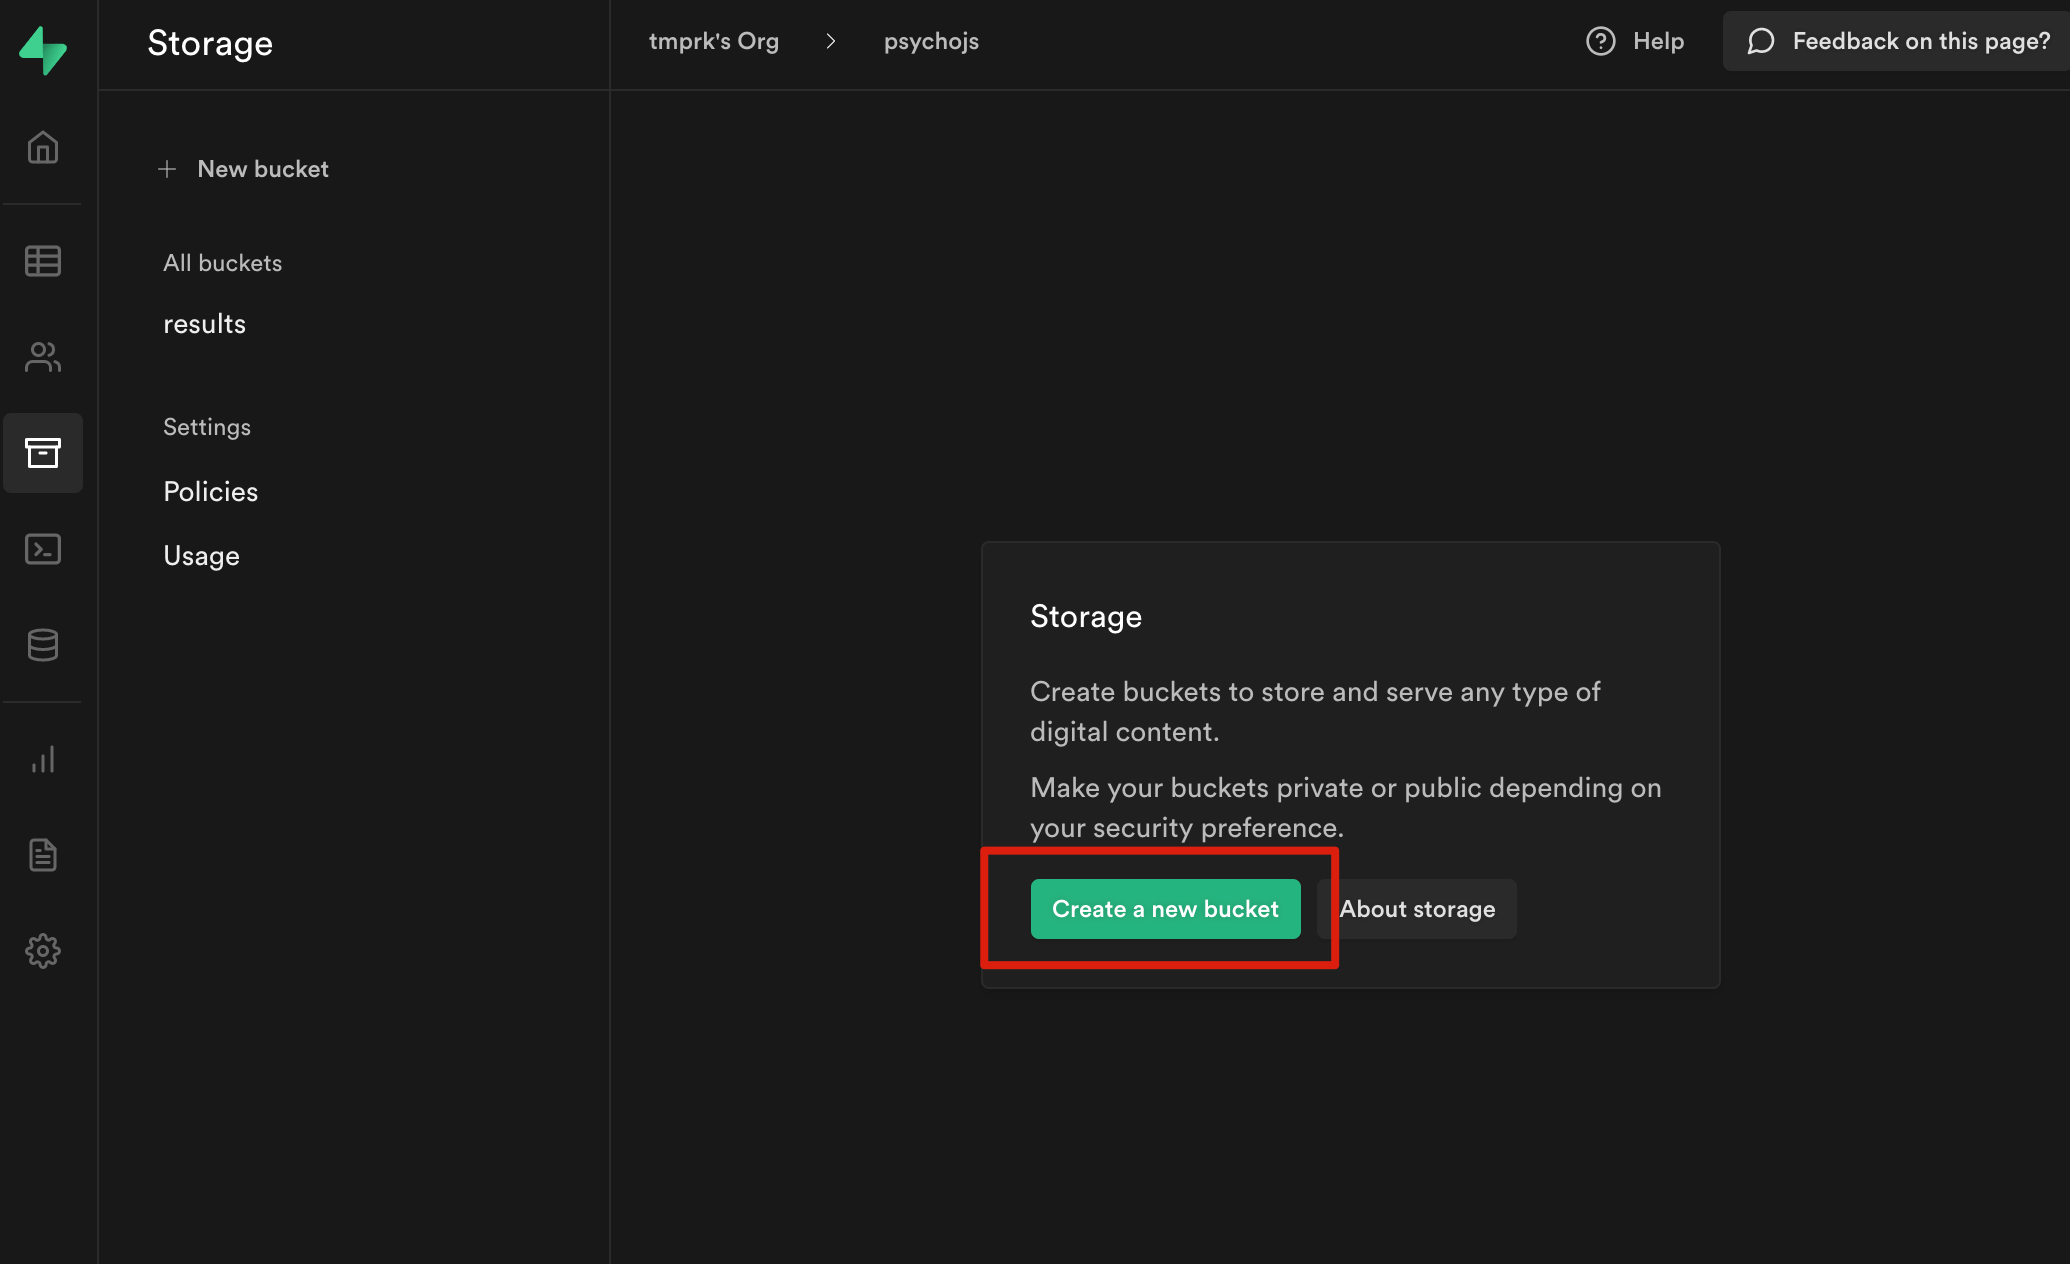
After creating a project, a storage bucket must be created. Go to the storage icon on the left navigation bar, and click “Create a new bucket”
Now that these things are created, we need to retrieve the database URL, API keys and access token. The database URL is an individual identifier for your project, and the API keys and access token are secret key that can be used to interact with the database (read and write data) and are used in the code. To get these things, look for the settings icon on the left. Click the icon > click API. You should see various fields that can be copied.
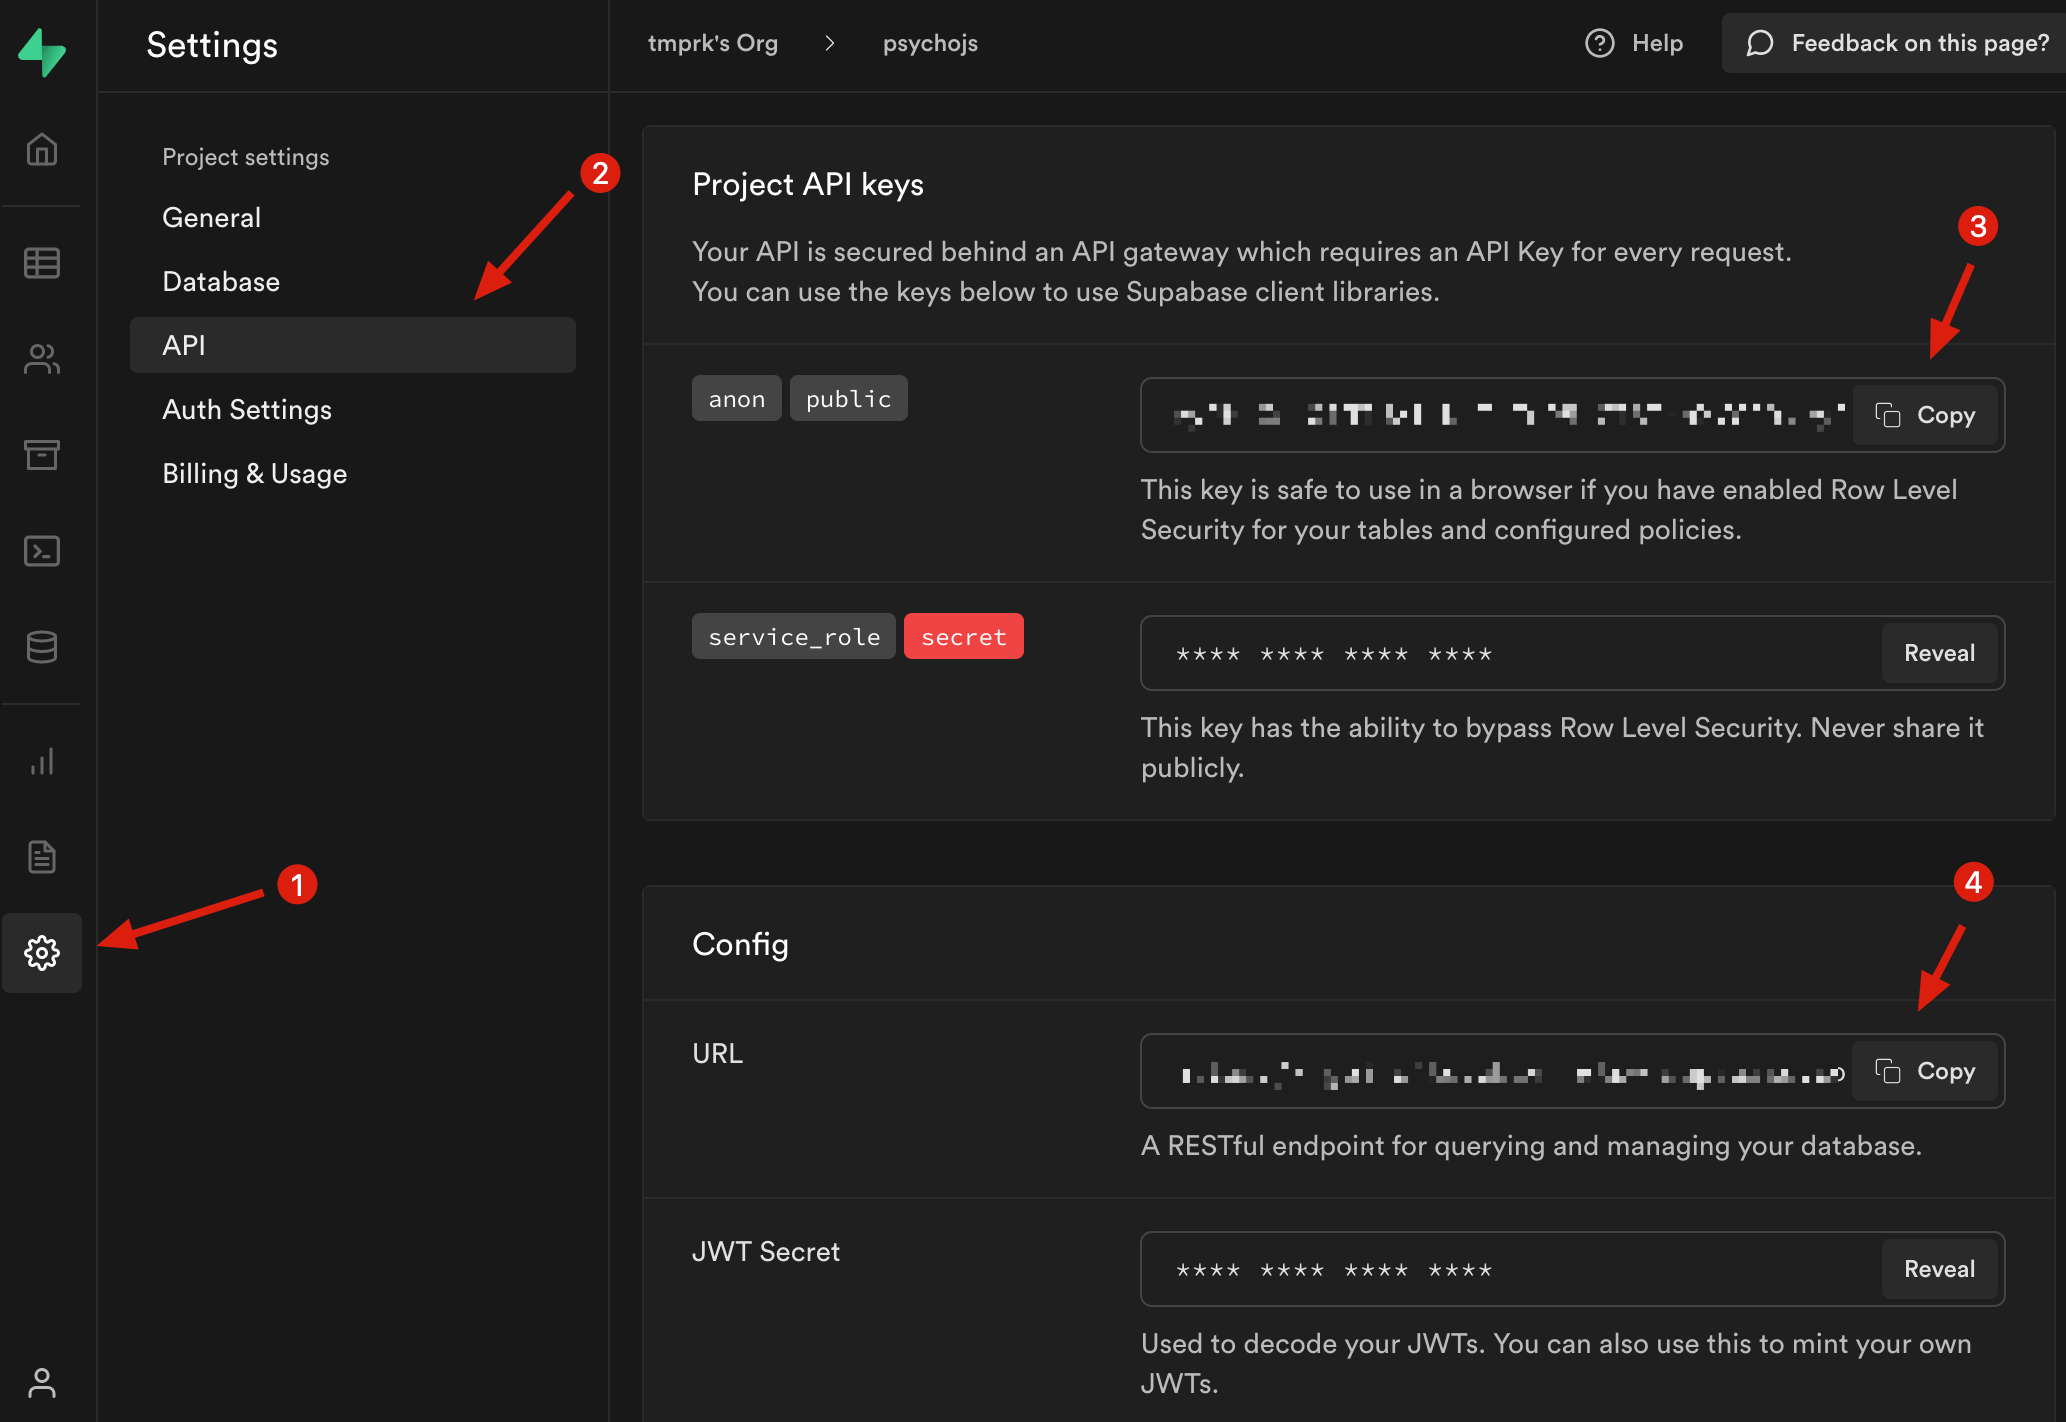
The top one (3) is the API key. The bottom one (4) is the database URL. These will both need to be added to your code so you can send the data to your own instance. To do this, create an .env file in the root of your project. This is an environment file and contains keys that should not be exposed to the public. Once you place these in the .env file, they will be read by the netlify function, so that it can run the code that uploads the CSV.
# in root of project in terminal
touch .env
nano .env # or open in your text editor

# paste these using nano, or in editor
DATABASE_URL={the data base URL you copied}
SUPABASE_SERVICE_API_KEY={your api key}
Let Netlify read your Github repo #
Now that you have it running locally, it should also be able to upload the CSVs to your supabase bucket as well. To get this deployed on netlify (for now, since we’re using netlify functions), you will have to first push the code to Github. After adding your API keys to the .env file, the code is now ready for upload.
Create a new Github repo on the website. Name it whatever you like. It lists out several ways to get your code onto the empty repo. What you’re interested in is the bottom section.
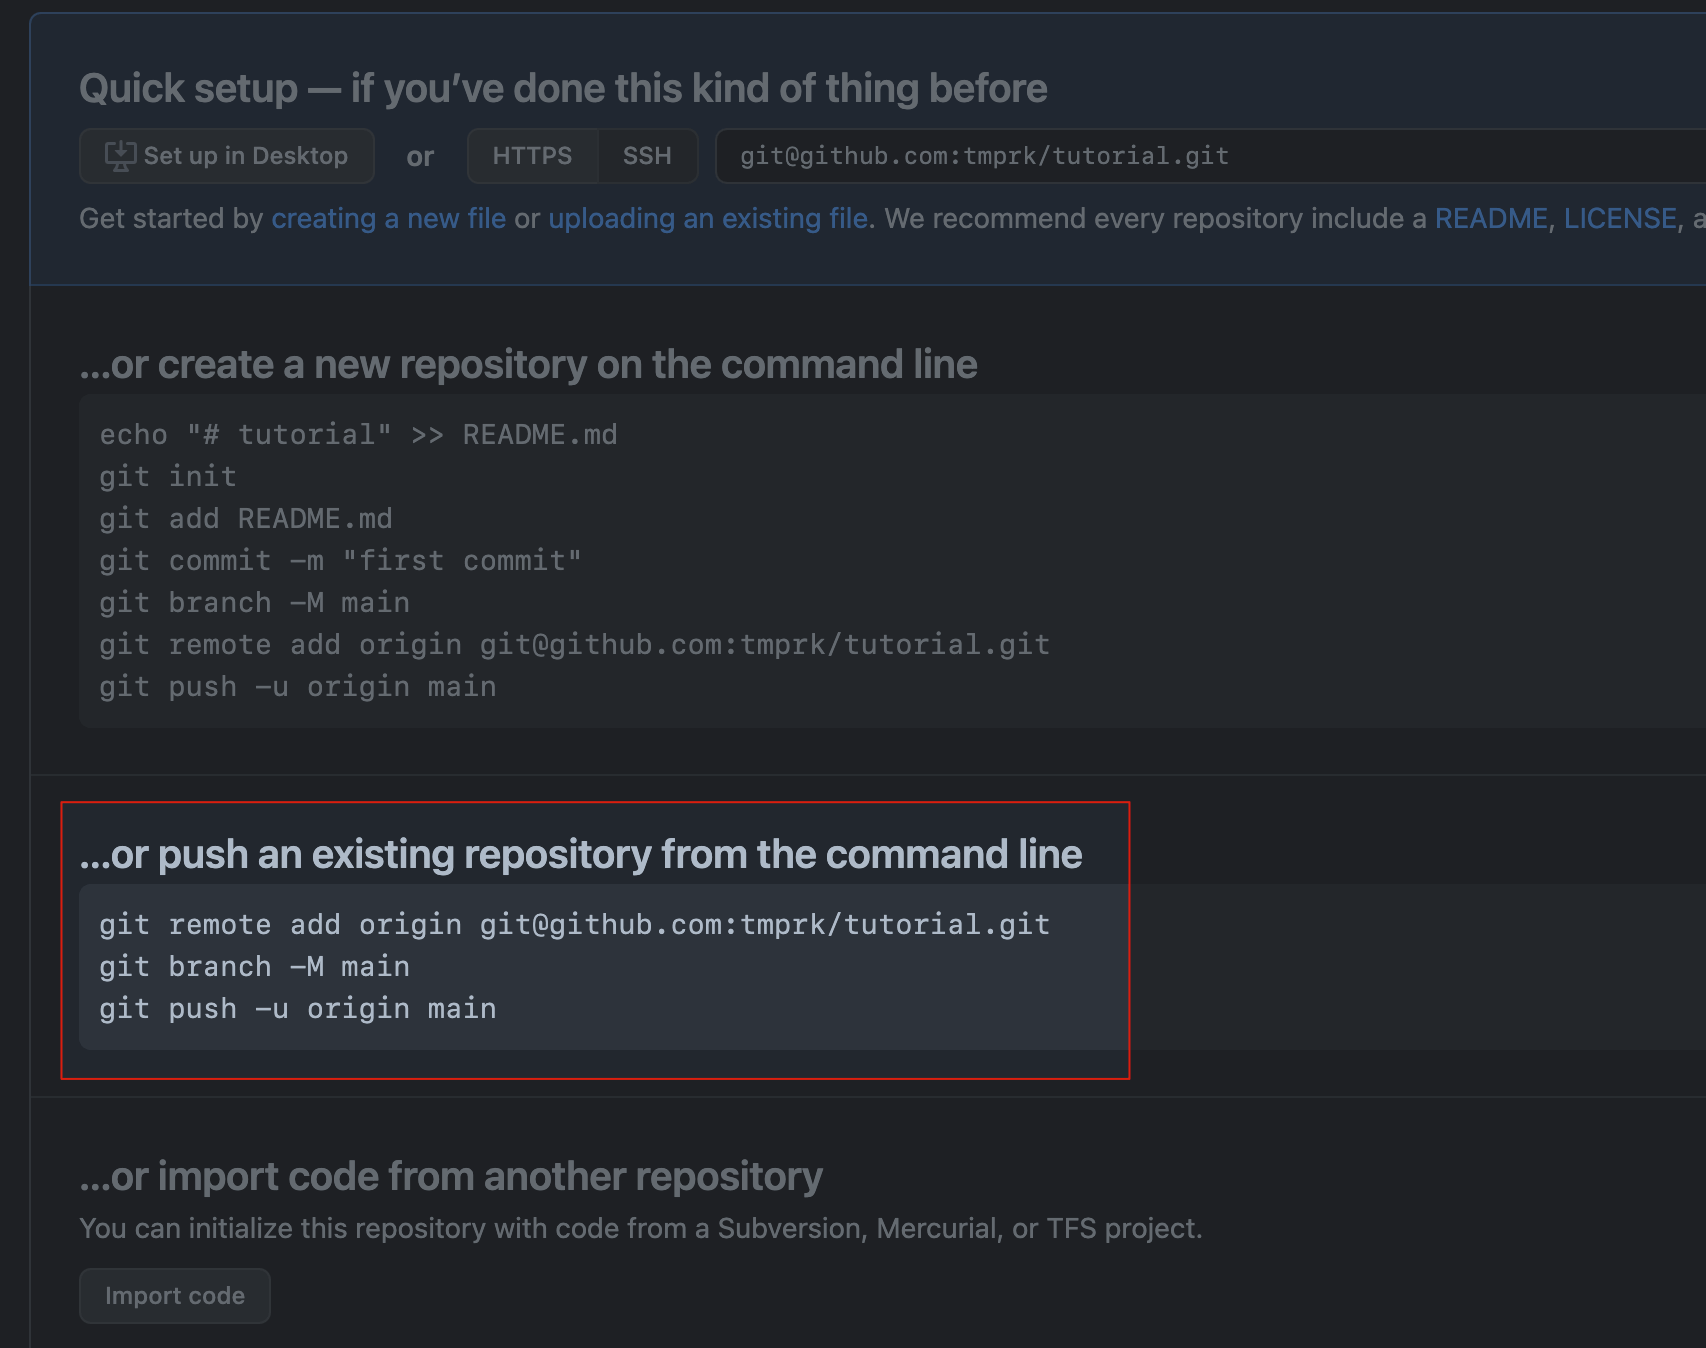
# since you cloned the repo, you need a *new* remote url to push to

# in the root of the project
git remote set-url origin git@github.com{your-username}/{repo name}.git
git branch -M main
git push -u origin main
Now you have to sign up with Netlify. They have a generous free tier of 125,000 requests per month, plenty of bandwidth for your site, and build minutes. Once you sign up, there will be a button that says “new site from git”. It will direct you to several options to authenticate with, so Netlify can read only the github repos you permit.
| new site from git | connect repo |
|---|---|
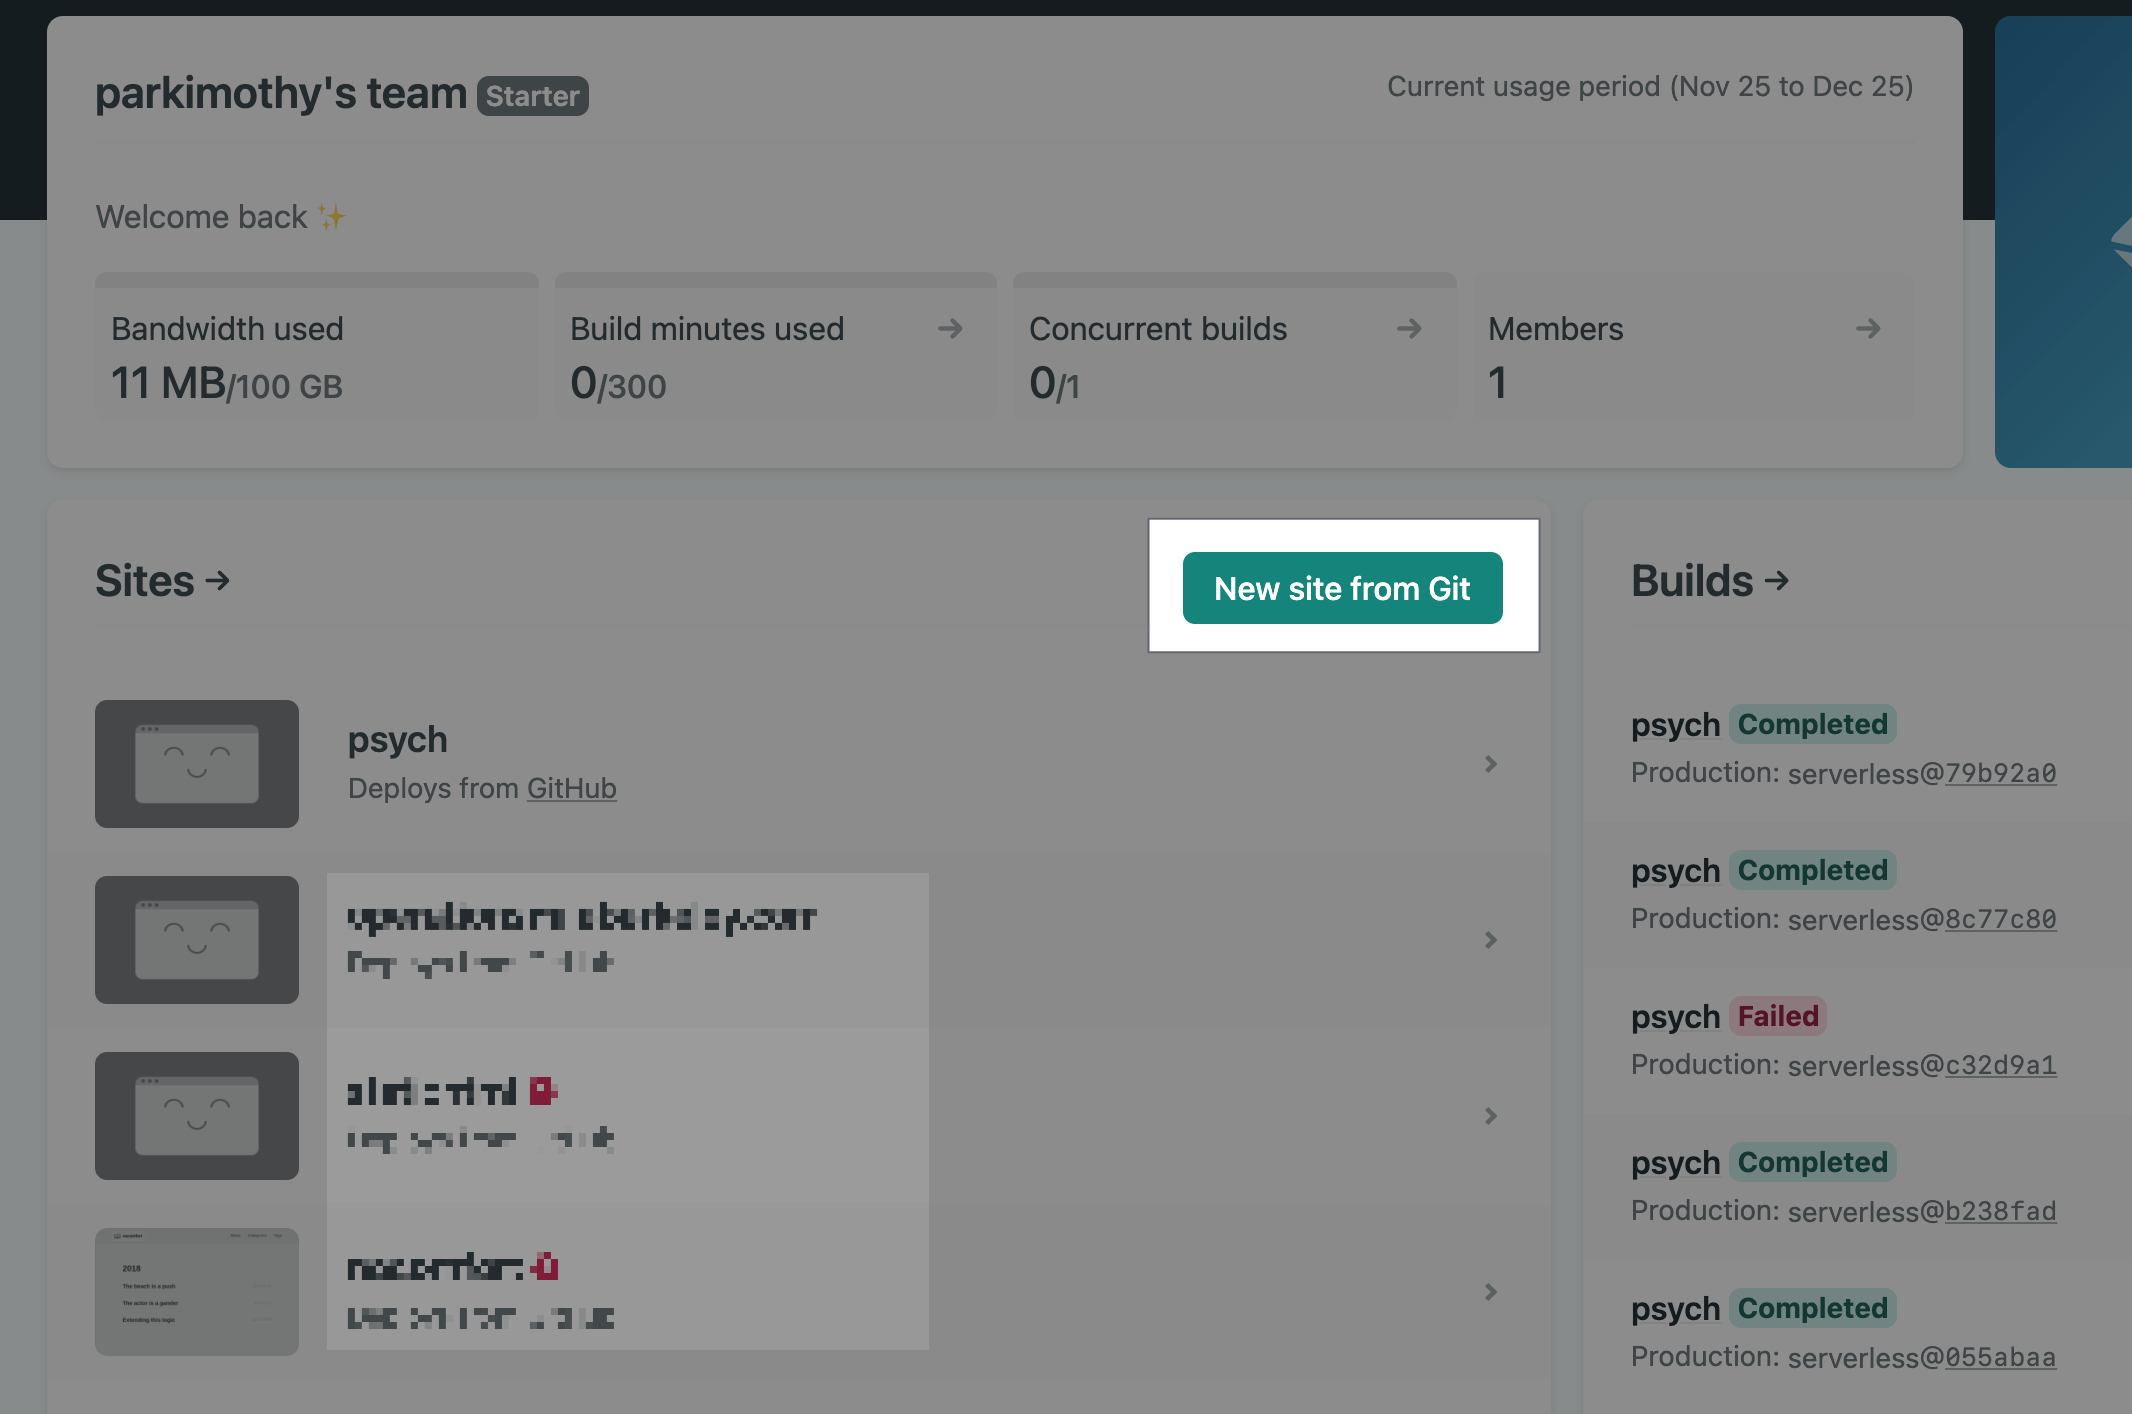 | 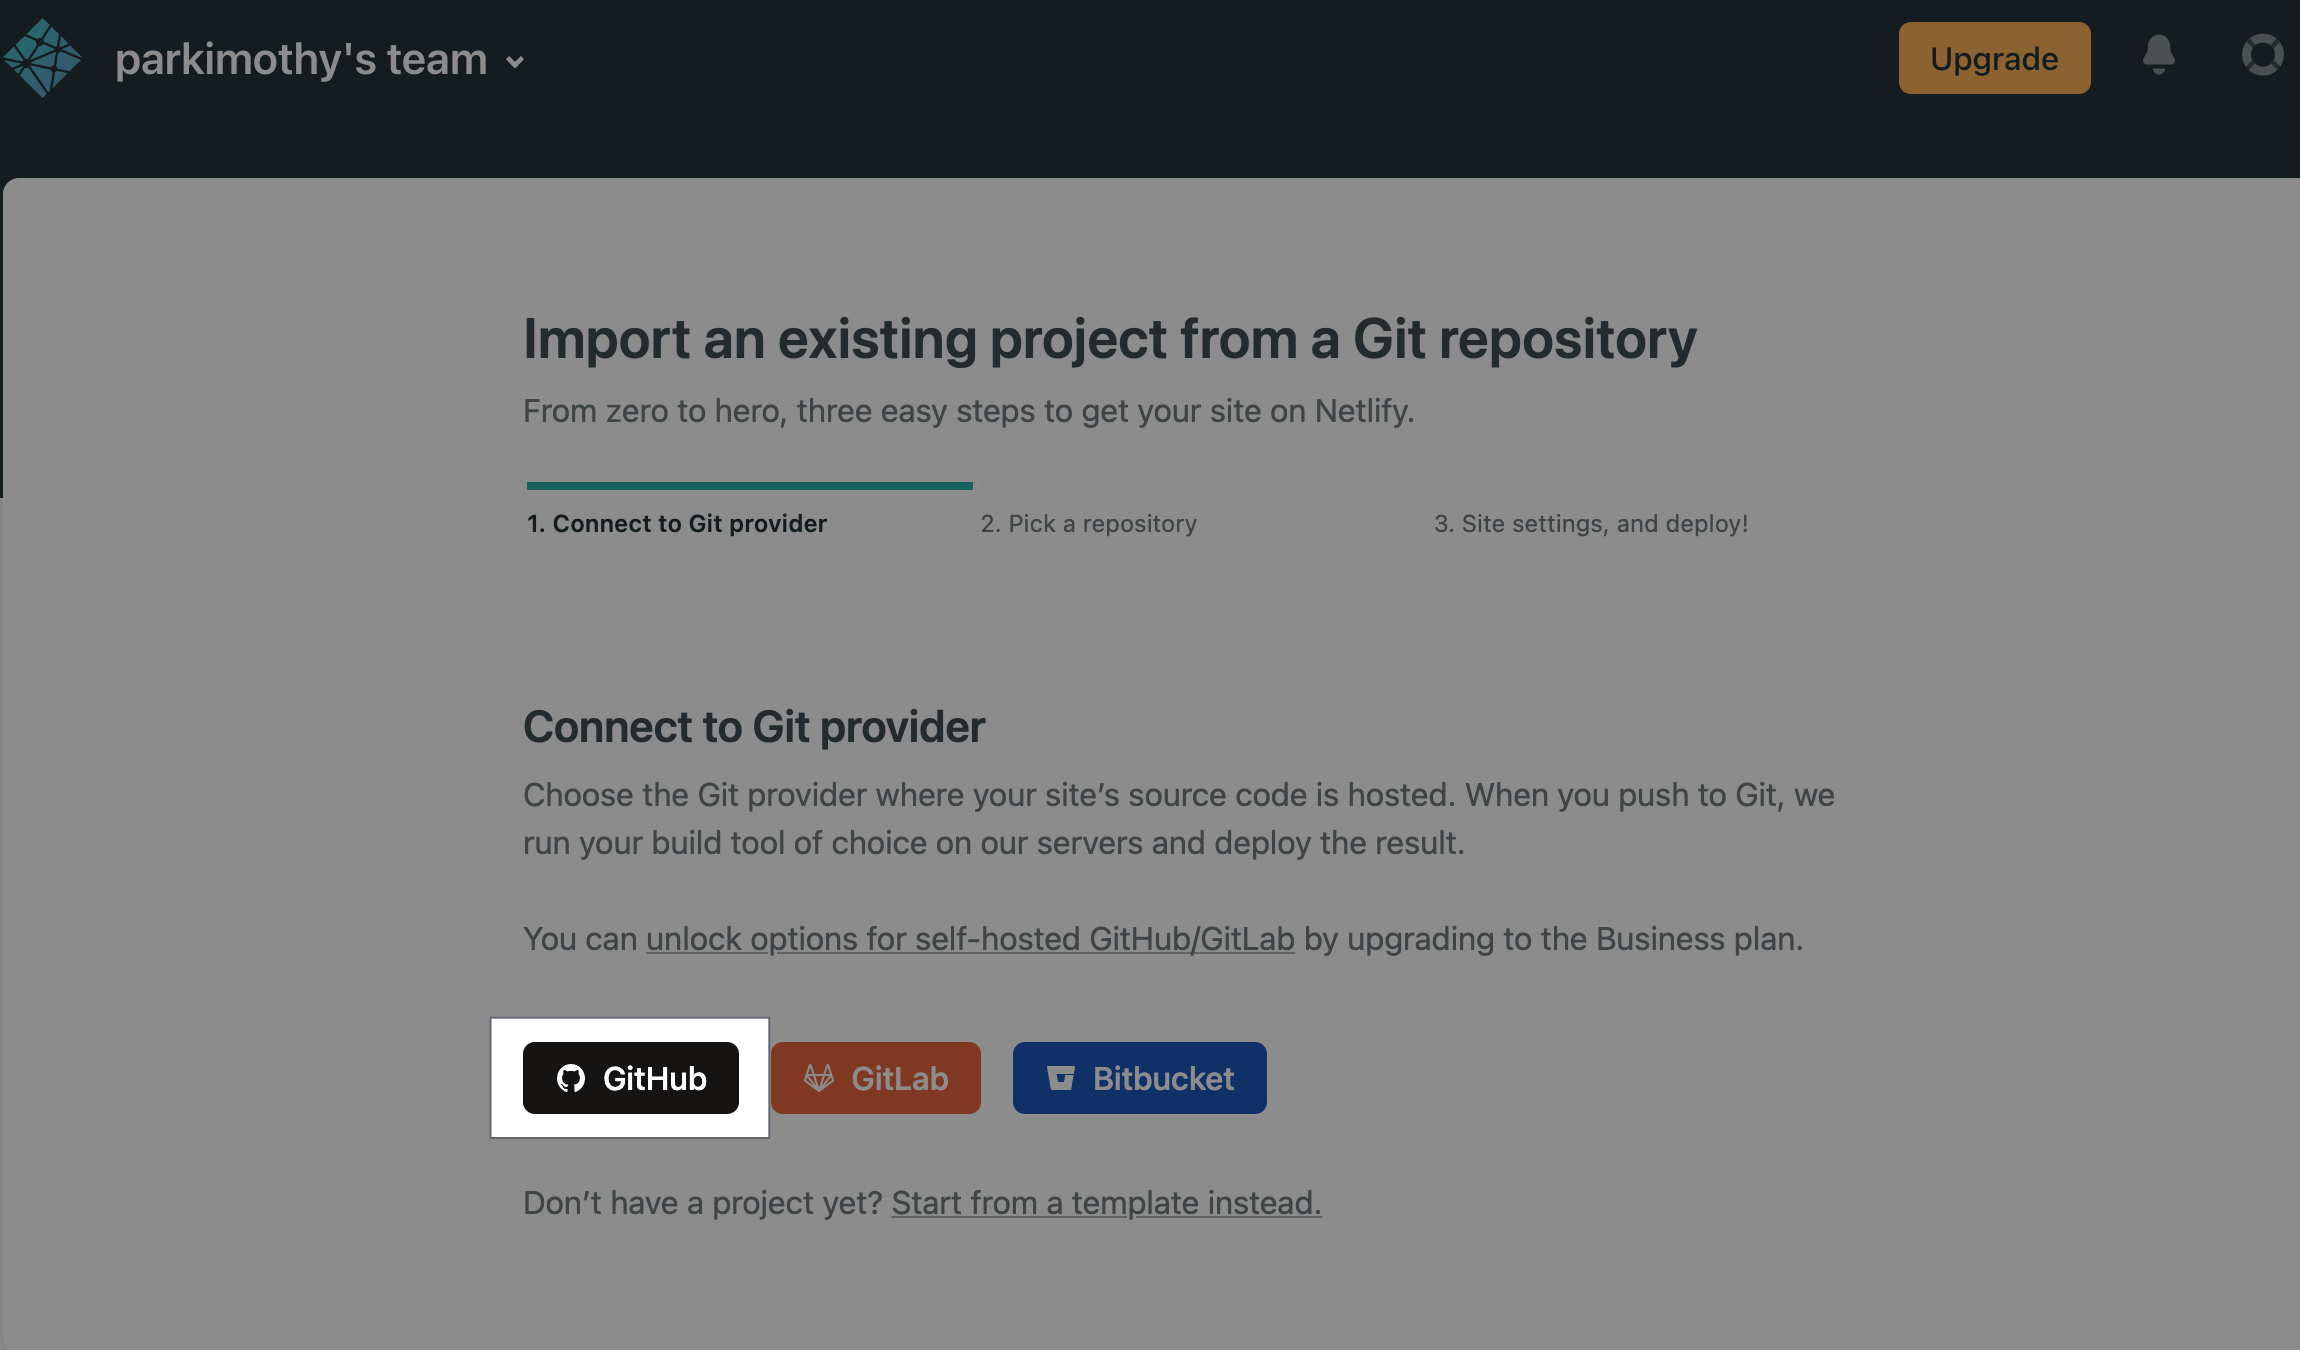 |
Once you select the repo that you gave Netlify access to, it will start building the site. It creates a build environment to set everything up. If everything goes to plan, the build should have succeeded. It should provide you a URL, which can be renamed in the site settings.
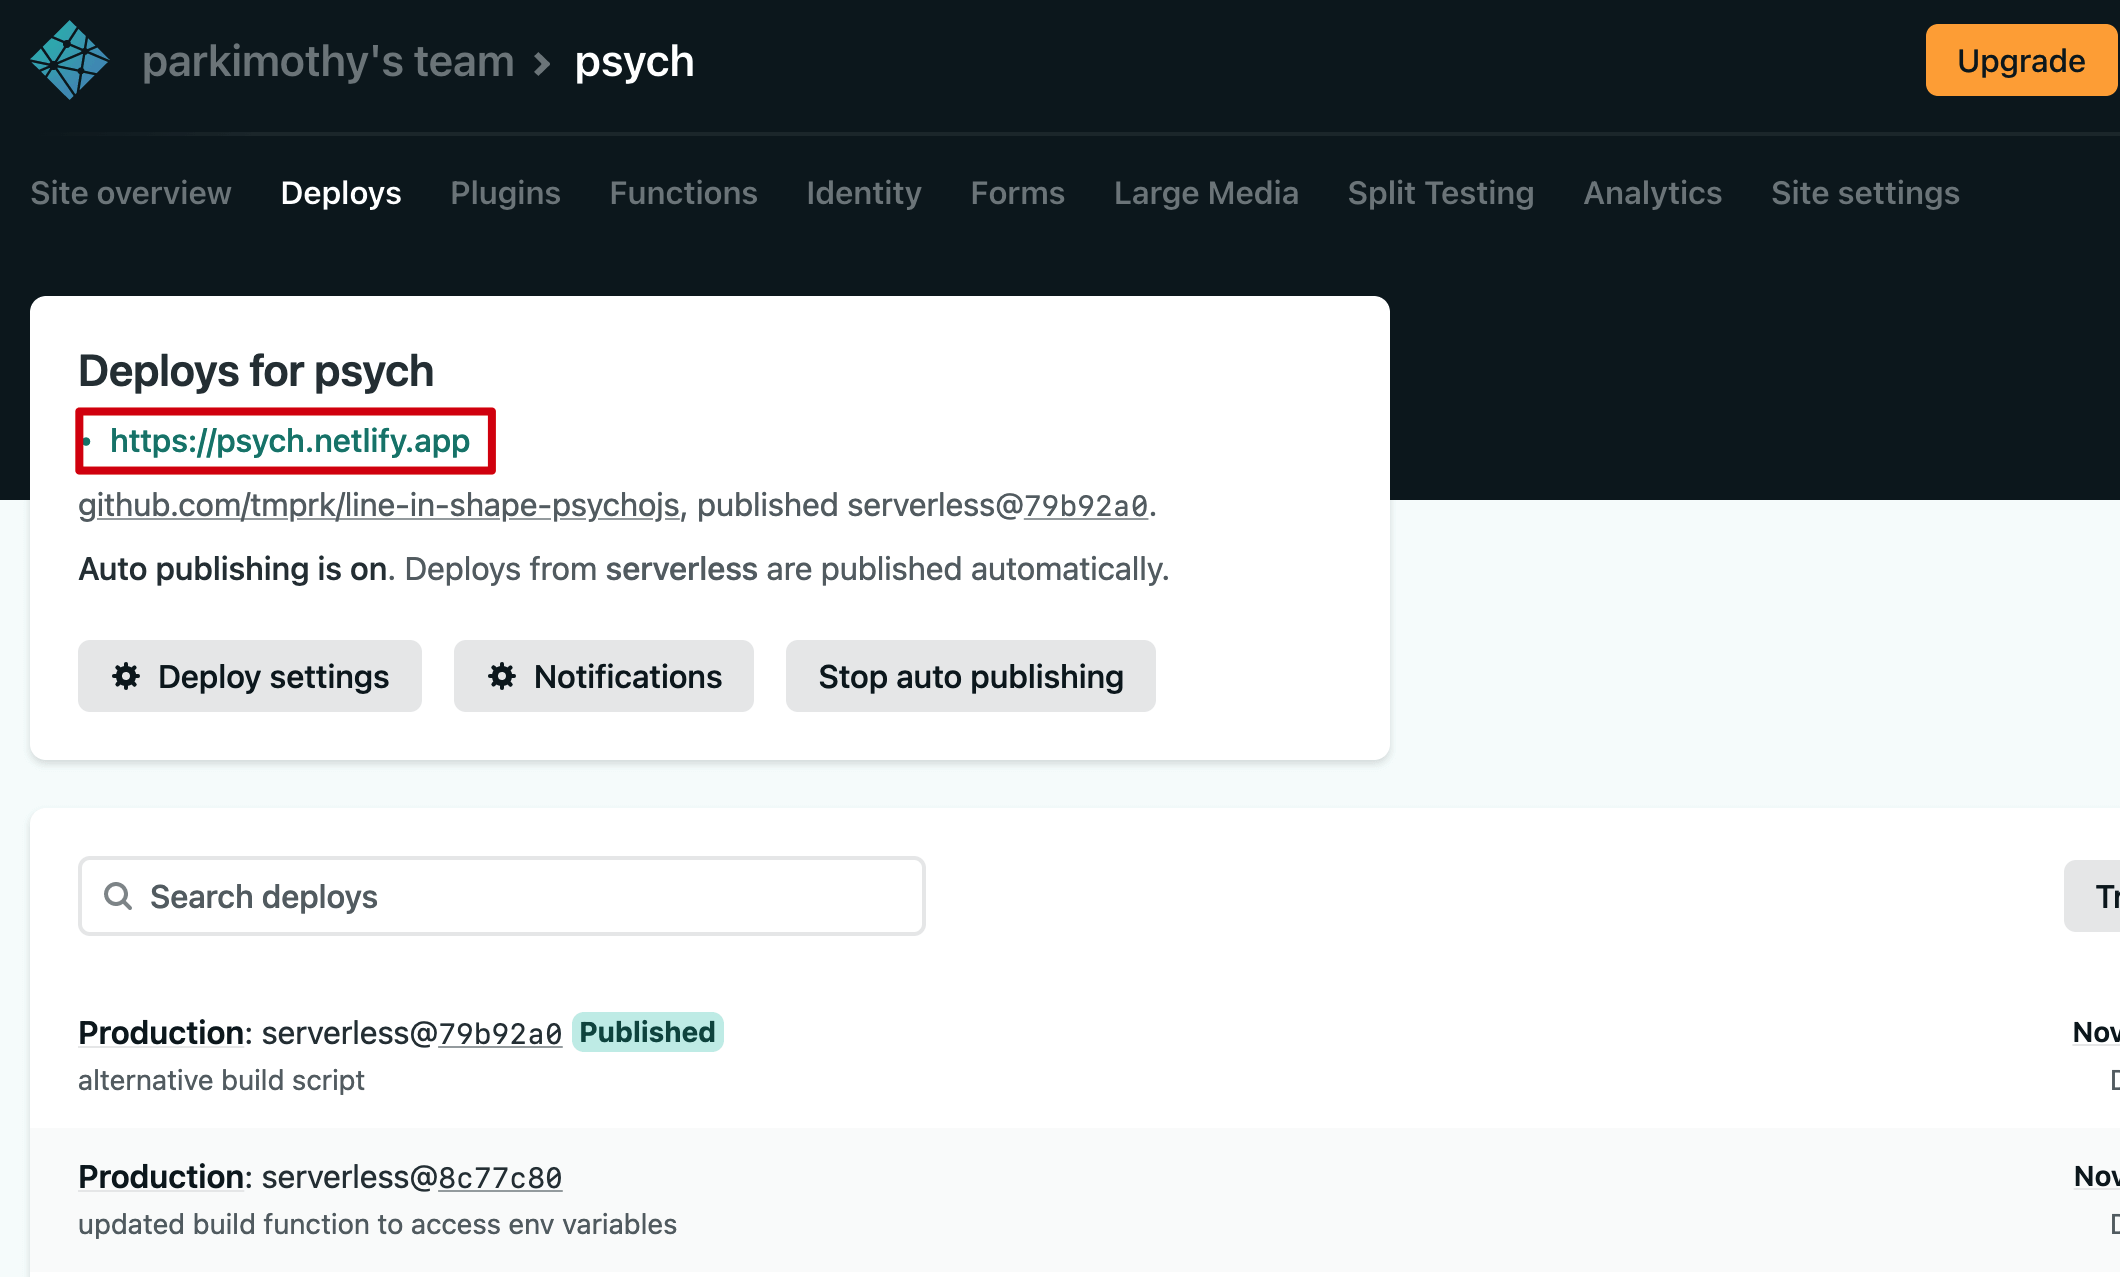
You can now access this site from anywhere in the world! If you’ve made it this far, then congratulations.
Moving forward #
If there are any suggestions, improvements, or issues encountered along the way, feel free to reach out via email.
Some things I would like to add to this (tentative list):
- Authentication via code given by research coordinator
- With the domain in the public, anyone can access and the program may be prone to bots and DOS’ing (highly unlikely for something so niche but could happen).
- Since it’s static, we can’t perform authentication so we would have to resort to Netlify functions again. Entirely possible though.